Shipping Boxes
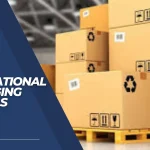
As the name suggests, shipping boxes refer to corrugated or cardboard boxes with a wide base and opening to deliver the goods. The shipping containers are the most frequently referred to as “cardboard boxes.”
Because the two side walls of shipping boxes are glued together during production, their ease of assembly is their most important feature. To save space, this kind of packaging is shipped unassembled.
Most of the time, shipping boxes transport large items (like household appliances) or secondary packaging.
Advantages of Shipping Boxes
Packaging Safety
These boxes are a good choice if you want to pack your products in a way that keeps them as safe as possible. The main aim of the corrugated boxes is to secure the product completely. Your packaged goods won’t shake around because of them. In any case, they likewise guarantee that your items are completely safeguarded from jerks, vibrations, and shock.
Highly Flexible
Numerous characteristics set cardboard boxes apart from other types of packaging boxes. These boxes can be changed a lot. They are simple to cut to any size or shape, and you can adhere, tape, or staple them however you like.
Packaging Availability
Cardboard boxes are readily available in addition to all the other distinctive characteristics of these packaging boxes. They come in various designs and shapes, including single walls, double walls, and so forth. However, you can choose what you want.
Pack a Variety of Goods
Cardboard boxes are an excellent choice for packaging. There is no limit to what can be packaged with them because they can be cut to any size or shape. Because of this, many businesses prefer cardboard boxes because they offer a wider range of options and make packaging more user-friendly.
Cost-effectiveness
It is a major reason many businesses must choose the right packaging boxes for their products. Some people cannot afford the cost incurred on the printing or customization of boxes. They do cost differently from other bundling boxes, like, for instance, plastic bundling.
Manufacturing of Shipping Boxes
The whole process is completed in 4 steps given below,
Step 1: Determine the Product’s Dimensions
Before making your boxes, you must first ascertain the product’s or products’ dimensions. Lay out your items to determine the most efficient way to arrange them, so they lie flat. You can measure your item if you are not working with multiple pieces.
Remember that these measurements should include any packing supplies you intend to use, like bubble wrap or foam inserts. It would help to get the total length, width, and height measurements. My measurements are as follows: Make a Shipping Box of 5
Step 2: Sketch the Layout
I recommend grabbing a scrap piece of paper to sketch the layout for the template you’ll be cutting. Length: 21″ Width: 10″ Height: 2″You probably already know how to do this math, but I always like to have something to refer to before cutting anything.
We will construct a box that can be folded into its final shape.
Create a Shipping Box 4. The dotted lines indicate our item’s height. Since the product we are packaging has a height of 2 inches, we need to extend that distance around the box.
You will include the 2″ and half of the item’s width for the large flaps. You can seal the box shut because this will guarantee that it will fold completely. This will be shown to you at the end of this post. Because the outer flaps will fold over the top of the inside flaps, the total width of those flaps is irrelevant.4 inches is usually what I use.
Step 3: Cut the Template
Once you know the dimensions, it’s time to cut a template that you can use multiple times to make these boxes. Use the template as your starting point if you only require one box!
Place a scrap piece of cardboard on the surface you use to cut your boxes. This will protect both the surface you are cutting on and the blade you use to cut the cardboard.
Step 4 of Making a Shipping Box
Perforating the Fold Lines, You must perforate the fold lines for the box to fold into its final shape. I make use of this Amazon-purchased perforation cutter. Use a box cutter, but be careful not to cut through the cardboard. You need to score the line to make it easier to fold.
To make the perforated cuts, I use a long ruler as a guide because if I try to use the cutter by hand, it tends to run away on its own.
Step 5: Make a Shipping Box: Pack it Up!
Box it up as the final step! To join the two ends of the box, grab a small piece of tape, as suggested by me. You can finish taping up the remainder of the box while this holds everything in place. Tuck any bubble wrap still sticking out and cover it with tape.


